
How to set up a Twitter account for your business.
No matter who you are or what you have to say – celebrity, fictional character or the man on the street – Twitter is open to you. And if you run a business, there’s lots for you there too.
The social media site can be used as a free brand channel by companies big and small; you can grow a community of loyal, engaged customers who want to know what’s happening with you.
The platform allows you to ‘talk’ to your customers, directly, in real-time. If you are thinking about setting up a Twitter account for your business, it’s actually one of the more simple things to carry out.
 Step 1 – Get up and running
Visit http://www.twitter.com
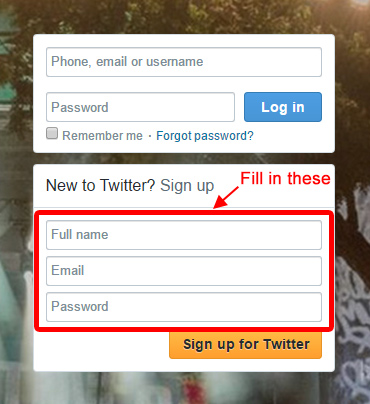
Type in your details on the homepage:
- Your full name (your actual name, not your business)
- you’ll get to pick a custom username at the next stage
- email address
- your chosen password
Then click ‘Sign up for Twitter’
The next screen is where you pick a username. You’ll see it brings your name, email and password through from the previous screen – double check your email is correct as Twitter will send you a verification email once your account is set up.
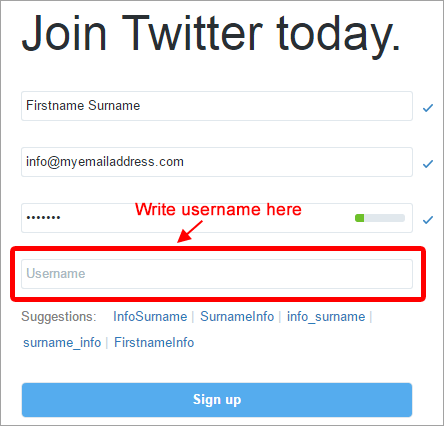 For the username, Twitter will give you some suggestions but it’s best to use your business name, and if it’s more than one word push it all together to form a single word (e.g. ‘House of Fraser’ would become ‘houseoffraser’).
Some examples of Twitter names:
- John Lewis shops: @johnlewisretail (@johnlewis seems to be taken by a man called John Lewis, so the retailer had to add ‘retail’ to the end of their username)
- Yell: @Yell
- HMV: @hmvtweets
When you enter your username in the form, Twitter will check it on-the-fly to make sure no one else is using it. Then click ‘Sign Up’.
Once this is done, your business is on Twitter and your verification email will be on its way to you (make sure you click the ‘Confirm Now’ link in the verification email it sends you).
On the Twitter site, the next screen you see will ask you for your phone number (a mobile number is ideal), it’s not mandatory (click ‘skip’ if you don’t want to add a number) but it is useful to have it on the account (you can always add/remove it later too). It means you can get text alerts when you get messages on Twitter and it adds other extra functionality. If you do add one then it’ll send you a SMS with a verification code which you just enter into a box on the Twitter site when it prompts you. Your mobile will never be shown to other Twitter users, it’s just for internal use.
Step 2 – Six-step setup
Next, you’ll be presented with a ‘wizard’ to help you get going – it’s 6 steps long.
Step 1 is easy, just read the text and click ‘Let’s Go’
Step 2 you need to tell Twitter what you’re interested in, you can tick the boxes of the content Twitter suggests or add your own (in to the box that says ‘Search for something you like…’). So for example if I were an Accountant I might type the word ‘Accountancy’, or perhaps ‘Financial’ so that I could follow Twitter accounts who like similar things to me. Once you’ve chosen/created a few topics press ‘Continue’.
Step 3 will suggest Twitter accounts you can follow based on the interests you entered in Step 2. You can tick the boxes next to the accounts you want to follow – you can follow them all, just some or none at all. Then press the ‘Continue’ button.
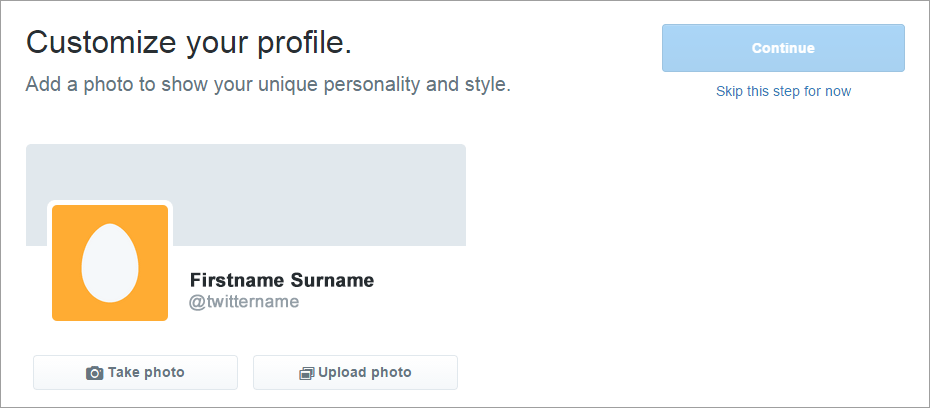
Step 4 is where you start customizing your profile. You have two images on your Twitter account, a small square profile image, then a larger rectangle header banner.
The small square image is the one you can edit first, and you’ll see from the screenshot below that it gives you the option to ‘Take a Photo’ or ‘Upload Photo’.
As this is your business account it will depend on what type of business you have as to what sort of photo you upload. If you are a sole-trader you could either use a photo of yourself or your logo (if you have one). If you are a company then you should probably use your logo. Be careful with your logo as many aren’t square so they might not fit well in the square profile image space – it may crop off the sides of your logo. Use an image editing program to add some space round your logo to make it squarer, or if you have a graphic/Web design company that you use then they can help you create the right size image – you might just have to go with a little bit of trial and error to get it right (you can always change it later). Once you’ve uploaded an image press ‘Continue’.
Step 5 helps you follow people you know on Twitter, there are options to let Twitter access your Outlook or other email contacts list so it can find their profiles on Twitter. If you would like to do this then click either ‘Upload your Outlook contacts’ or ‘use a different email service’ and follow the instructions. If you’d prefer not to then, at the bottom right of the page, click ‘Skip this step’.
Step 6 allows you to follow some more people, Twitter will try to find people and companies that it thinks you know and will suggest profiles you can follow. On the page you can tick the boxes next to the ones you want to follow – you can follow them all, just some or none at all. Then press the ‘Continue’ button.
It will now set up your Twitter profile and take you to your Twitter ‘home’ page – this page displays:
- Your profile overview (top of left column)
- a list of tweets from people you are following (centre column)
- current Twitter trends (right column)
- suggestions of who to follow (centre column)
- a box so you can write a Tweet – click inside the box where it says ‘What’s happening?’ to start writing your tweet. (centre column)
Step 3 – Dress up your profile
As it stands, your Twitter profile will be pretty plain-looking. To add some personality to it, you’ll want to add a profile picture (if you didn’t already in the six-step setup), a header image, some text about you and links to your Website.
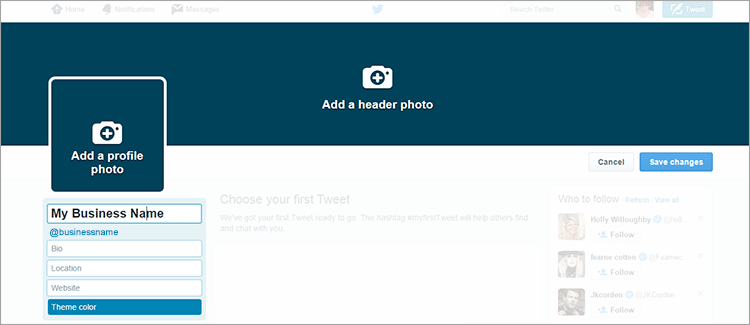
To do this, from the home page click on your profile overview (top of the left column). Your profile will look something like this (although less filled in!):

You’ll see the URL of your page will be something like: twitter.com/YOURUSERNAME – this is your personal Twitter address. Some examples of this:
- https://twitter.com/yell
- https://twitter.com/tesco
- https://twitter.com/houseoffraser
The first place you need to click is on the page is ‘Edit Profile’. This will allow you to edit your profile and header images, the text about you, your company display name and add a Website address – you can even choose a ‘theme color’ which will determine what color links and backgrounds your page has (it’s best to choose one of your company colors so it blends in well with your logo). You’ll see from the image below that if gives you clear indications of where to add images and to fill in the profile text and add your Website address.
The recommended sizes for the two images on your profile are:
- Header photo – recommended dimensions are 1500 x 500 pixels
- Profile photo – recommended dimensions are 400 x 400 pixels
Step 4 – More customizations
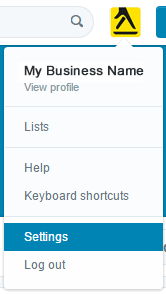
If you head to the account administration area at the top of the page (it’s in the very top bar, it is a small square version of your profile image) then click ‘Settings’ you can access more in-depth profile customizations.
In this area it is possible to:
- Change settings like your email address, time zone, language and mobile number
- You can change your @ username (maybe you have made a mistake or something better has popped into your head?) – be wary of changing the username of your account at a later stage once you have a lot of followers as people will get used to your profile name and might not recognize you if you change it. Plus your profile Web address will change (e.g. twitter.com/OLDNAME to twitter.com/NEWNAME) and you’ll have to alter everything that has a link to it
- Change alerts and notifications
- De-activate/re-activate your account
Step 5 – Tell me if my ears should be burning!
When in the ‘Settings’ section, there are three options for notifications – Mobile, Email notifications & Web notifications. You can decide if you’d like to be notified each time someone mentions your Twitter username, if someone sends you a direct message (also known as a DM), if your tweet gets favorited, if you get a reply/retweet (RT), or if someone new has started following you – it’s a great way to monitor activity on Twitter.
Once you’re done with all that setup, you’re ready to get tweeting!